I'm caught with orders and shipping and my son all day long but I decided to start a new section on my wedding blog: Do It Yourself Wedding Tutorials. I hope I can keep up :)
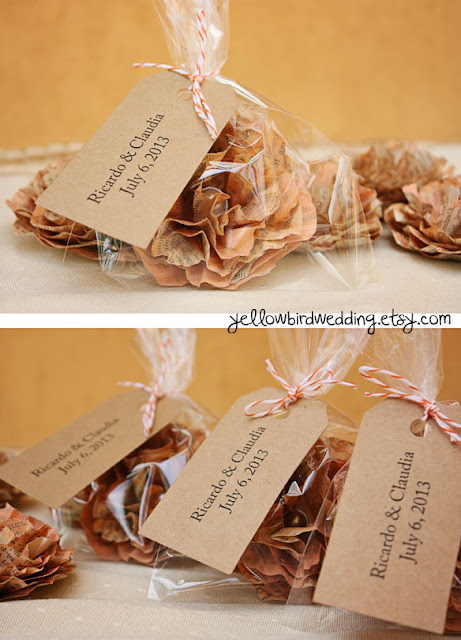
So, I got an order from Claudia for my handmade paper flowers. She wanted to gift them as favors at her wedding and she asked me if I could somehow package them for her. I gave her a couple ideas and she finally settled for this combination: cello bag + baker's twine + tag.
I LOVE the final look:

You'll need:
1. A normal printing paper
2. A printer with direct feed (haven't tried auto feed yet). Mine's an HP inkjet that takes on thicker papers and cardstock.
3. Your tags or pieces of paper. I cut mine using the Alterations Tags from Tim Holtz. For those of you that aren't familiar with die cutting you need a machine like Sizzix or Cuttlebug to help you out here. Or you can take the easy way out and order your tags from ebay.
4. A pair of scissors
5. A double sticky tape or a tacky one.
6. A pencil.

STEP 1: Design your text and test it out on a piece of regular paper to fit your pre-cut paper/tags. You can print more sizes on one sheet of paper and pick the one you like. When you're pleased with the size, take a new sheet of paper and print it out again using the size you liked best.
I am printing 3 tags at a time so I printed my text out 3 times on the sheet of paper.

STEP2: Stick the tags to the printed paper, arranging them so the text would come where you want it to.
If you use regular double sticky tape, before you fix the tags, make sure you dab the glue with your fingers several times so it loses the strength to stick otherwise you will tear your tags (see the 2nd photo!)

STEP 3: Stick the tags in place.
Optional: Mark the exact place of the tags with a pencil so it's easier to re-use if needed.

STEP4: Feed it to the printer! :) Make sure you introduce the paper the same way you did when you printed the text on the white sheet of paper. Hit Print again.
When it's done just carefully peel off your tags.

STEP5: ENJOY! You can use the same sheet of paper a lot of times over... until the sticky tape doesn't stick anymore. Be careful not to jam your printer ;) It works on mine but I think it depends from model to model.

Hope you enjoyed my tutorial! Let me know if you'd like to see more wedding related tutorials and I'll do my best to put some up for you.
See you next time!

Whats the most you have put on onw sheet?
ReplyDeleteI managed to print around 70 on this one sheet. Then the glue starts to wear off. You can place another sticky tape after that on the same spot and continue.
ReplyDelete